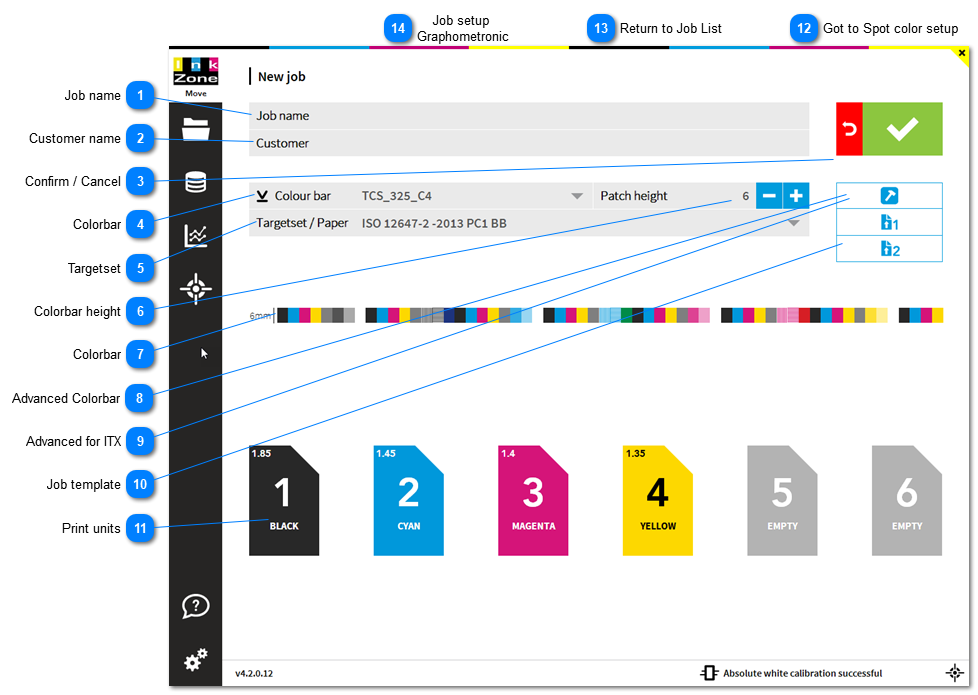
1.3.2. New Job

|
Add a customer/print buyer name to the job.
IZReport can send PDF reports to customers. For this scenario, it is Important that the costumer name set here matches the one in the e-mail setup, see here: 1.2.7. System Setup
|
|
Colorbar for the front side print.
When printing with perfector, the back side colorbar needs to be set too.
Define spot color patches in the colorbar, see here: 1.3.2.2. Spot color job
|
|
Print targetset.
When job starts from InkZonePerfect the targetset is set automatically . How to link the ink-preset calibration curve from InkZonePerfect
to a targetset see here: 1.2.3.2. New Targetset
|
|
Align the measurement data related to the ink-keys either centred (standard) or shifted.
See details here: Shifted ink-key alignment
|
|
In advanced setup set the colorbar position with XY coordinate values when using an IntelliTrax scanner.
Go to Intellitrax XY colorbar setup: 1.3.2.2. Advanced Job Settings
|
 Select a predefined template job. A template job has a defined targetset, colorbar, color sequence and machine type.
See here how to set a template job: 1.1.1.1. Job-Setup View
|
|
See here: 1.3.2.3. Graphometronic Job Setup
|

